How to Configure Additional Backup Destinations on a cPanel Dedicated Server or VPS
This article explains how you can configure your cPanel server to back content up to a wide variety of mostly remote services, including our own remote storage service. If you use our remote storage service and need help to configure it, please contact us. We're here 24/7 to assist.
ℹ️ Backups to additional locations are handled by a separate cPanel backup transport process that starts once local backups have been created. The backup transport process runs separately from the local backup process.
Adding New Backup Destinations
To configure additional backups for your dedicated server or VPS, please use the following steps:
-
Log into WHM as root. You can usually do this by accessing https://your.server.hostname/whm in your browser.
-
Once in WHM, if the sidebar isn't visible, click the hamburger icon to expose it:

-
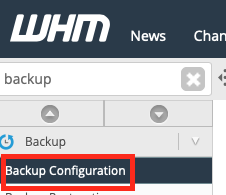
You can type "Backup" in the sidebar search box and then click on the Backup Configuration sidebar menu option:
-
The Backup Configuration options will appear in the main part of the WHM window. Since we want to configure more backups, you need to click on the Additional Destinations tab at the top of the screen:

-
By default, no additional backup locations are configured. You will need to create one first. To do that you start by selecting a Destination Type from the drop-down list and then clicking on Create New Destination:
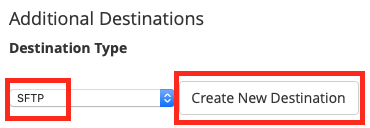
ℹ️ There are lots of destination types to choose from and you can even create your own custom destination type if you wish. Select one of the expandable sections below to learn more about the common destination types. If you already have at least one additional backup destination configured, you can manage it following the directions below the expandable sections.
Local
Although you handle configuration of a main local backup in the Backup Settings tab (see our discussion of that HERE), you can also save a duplicate copy of backups to additional local directories. Follow these directions to set up an additional local server backup location:
-
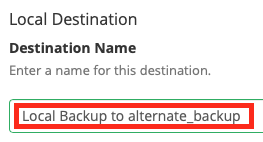
Specify a name for this new local backup destination. The name will appear in the Destination column of the Additional Destinations table. This can be whatever you want, but it should be descriptive so that you can tell it apart from other backup destinations.
-
Since this is a local backup, we strongly recommend that you enable backing up your server's system files to this backup location. You can do that by checking the box next to Transfer System Backups to this Destination. This will allow you restore some critical server files in the event that your server is compromised or those files suddenly become damaged/unavailable in the normal location.

-
Next, specify the local directory where you want to save your additional backups. You must specify the full path to the local directory, so whatever you enter must start with / and cannot be the same location that is specified in your Backup Settings.

-
If the alternate local backup location is on a separate hard drive or mount point, you can have cPanel mount or unmount it as needed by checking Mount Backup Drive as Needed.

-
Finally, you need to save everything you've just entered if you want the backup transport system to use it. Clicking the Save Destination button will save what you've just entered, but won't test what you've entered to see if a successful read and write is possible. If you click on the Save and Validate Destination button, what you've entered will be saved and then a separate attempt will be made by the backup transport system to use the details you've just entered to write and remove a file and the result of success or failure will be displayed. Finally, if you click Cancel nothing you've entered will be saved and you will be taken back to the main destinations list again.

-
Continue with the steps below this tab to continue working with existing backup destinations.
SFTP
One popular secure protocol is SFTP. Despite the similar sounding names, SFTP is not a more secure version of the older FTP protocol. It is a method of securely transferring content via SSH (Secure SHell). In most cases, if you cannot log into your remote backup service via SSH, then you probably cannot access it via SFTP.
-
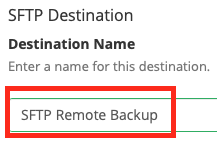
Specify a name for this new remote backup destination. The name will appear in the Destination column of the Additional Destinations table. This can be whatever you want, but it should be descriptive so that you can tell it apart from other backup destinations.
-
Since this is a secure method of transferring data, we strongly recommend that you enable backing up your server's system files to this remote backup location. You can do that by checking the box next to Transfer System Backups to this Destination. This will allow you restore some critical server files in the event that your server is compromised or those files suddenly become damaged/unavailable locally.

-
To back up your data, you need to specify a location in your SFTP account to store the backups. This needs to be a location in your SFTP account that your SFTP user can read and write to in a non-public area of the SFTP account. The location you specify needs to be relative to the location you start in when you first log in via SFTP (your home directory). So your path should not start with a /. This is optional. If you don't specify a path or directory here, the system will try to place backups in your SFTP user account home directory.

⚠️ It is a good idea to store your backups in a directory used only for backups and nothing else so that only cPanel is reading or writing data in that location. This makes it more likely that nothing will accidentally interfere with the process of storing the backups.
-
Next, you need to provide the service hostname or IP address that you use to access your SFTP account. This is the Remote Host. You can get this typically from the welcome information you received when you signed up for remote storage service. You should only enter the hostname or IP address here. The port used to access the service is specified in the step below and the path to store the backups are specified above.

-
The Port is the "channel" on which cPanel will communicate with the remote storage server. The default is port 22, since that is the standard port used for SSH communications, but your provider may use something else. Typically you'll find the port listed in the welcome information you received from your remote storage provider.

⚠️Important!
Whatever port you specify above must be opened outbound in your local server's firewall, or you won't be able to make a remote connection. If your firewall has separate port whitelist settings for different protocols, you'll typically only need to open the port outbound for TCP traffic.
-
In order to properly connect to the remote service, you need to specify the Remote Account Username, which was likely provided to you in the welcome information you received for your remote storage service.

-
Now you need to specify how you want the system to authenticate with the remote SFTP account. Since SFTP is basically SSH access, cPanel's remote backup transport system supports connecting via a public/private key pair (which is the most secure option) or via standard encrypted username and password authentication. Select which Authentication Type you want to use by selecting the radio button that appears in front of the method you'd like to use:

-
If you are going to use Password Authentication, then follow the steps below. If you are going to use Key Authentication, skip to step 9.
-
Specify the SFTP user password in the Remote Password field:

⚠️ What you type in this field will not be visible while typing, so be careful to enter everything correctly. Also, if you edit this remote destination, the Remote Password field will be empty. You don't need to re-enter the password in this field unless it has changed. The system will securely remember the last password you successfully saved.
-
The only other item you have to specify if you are using a username and password to authenticate is how long you want the system to wait for the remote service to respond to the authentication request before giving up. The Timeout value needs to be at least 30 seconds, but can be as many seconds as you wish. Skip to step 10 now.

-
-
If you are going to set up Key Authentication, follow the steps below. Otherwise, skip to step 10.
-
In order for public/private key authentication to work, you must create or already have a valid public/private key pair on your local server. If you don't already have one created and you'd like cPanel to create one for you, skip down to the Generate a New Key button and follow these steps. If you already have a public/private key pair created and installed on the server, go to step b below.
-
This step is optional. If you'd like to name the key pair something specific (like "remote_backup_key"), you can specify it in the Key Filename field. If you leave this field empty, the name id_rsa or id_dsa will used once you pick the type of key you want to create below.

-
Next, enter a password you want to use with the key. You can create a key without specifying a password, but if someone gets a hold of your private key they will be able to access any services that use that key until you revoke it. If you specify a password, then the person with the key won't be able to use it unless they also know the password.
⚠️ Important!
We do recommend that you enter a secure password in the Passphrase field and keep that password somewhere secure, like an encrypted password manager. Don't forget the password or the key pair will become useless.
-
You need to choose the type of key pair you want to create. You can choose from RSA or DSA from the Key Type drop-down menu:
-
You'll also need to select the Key Size you want to use. The key size is specified in bits. Larger key sizes are more secure, but make secure communication a bit slower.
⚠️ If you aren't sure what key type or size to select, we recommend using RSA with a size of 2048 or higher.
-
Click the Generate Key button to make the new key with the settings you've specified and continue to step b. Alternately, you can click Cancel and no key will be made.
-
-
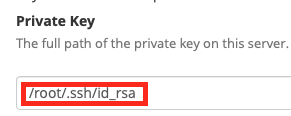
Once you have a key pair installed on your server, you can specify the path to the private key in the Private Key field:
-
If you created a key via WHM earlier that key should appear under the list of Private Keys here. Click on the name of the key and the appropriate details will be filled into all the fields in this section.
-
If needed, enter the private key password in the Passphrase field:

-
You need to tell the backup transport system how long you want it to wait for the remote service to respond to the authentication request before giving up. The Timeout value needs to be at least 30 seconds, but can be as many seconds as you wish. Skip to step 10 now.

-
-
Regardless of which type of authentication you choose, you now need to save everything you've just entered if you want the backup transport system to use it. Clicking the Save Destination button will save what you've just entered, but won't test what you've entered to see if a successful connection is possible. If you click on the Save and Validate Destination button, what you've entered will be saved and then a separate attempt will be made by the backup transport system to use the details you've just entered to connect to the remote server via SFTP and the result of success or failure will be displayed. Finally, if you click Cancel nothing you've entered will be saved and you will be taken back to the main destinations list again.

-
Continue with the steps below this tab to continue working with existing backup destinations.
FTP
FTP is a very common insecure file transfer protocol. While FTP is quite common and works with our own remote storage service, it generally should only be used if there aren't more secure protocols supported by your chosen service. To set up a remote FTP backup destination, follow these steps:
-
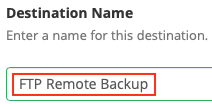
Specify a name for this new remote backup destination. The name will appear in the Destination column of the Additional Destinations table. This can be whatever you want, but it should be descriptive so that you can tell it apart from other backup destinations.
-
Since this is an insecure method of transferring data, you should not back up system files via FTP. So leave Transfer System Backups to this Destination unchecked:

-
In order to back up your data, you need to specify a location in your FTP account to store the backups. This needs to be a location in your FTP account that your FTP user can read and write to in a non-public area of the account. The location you specify needs to be relative to the location you start in when you first log in via FTP (your home directory). So your path should not start with a /. Filling in this field is optional. If you don't specify a path or directory here, the system will try to place backups in your FTP user account home directory.

⚠️ It is a good idea to store your backups in a directory used only for backups and nothing else so that only cPanel is reading or writing data in that location. This makes it more likely that nothing will accidentally interfere with the process of storing the backups.
-
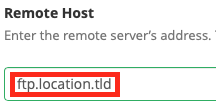
Next, you need to provide the service hostname or IP address that you use to access your FTP account. This is the Remote Host. You can get this typically from the welcome information you received when you signed up for remote storage service. You should only enter the hostname or IP address here. The port used to access the service is specified in the step below and the path to store the backups are specified above.
-
The Port is the "channel" on which cPanel will communicate with the remote storage server. The default is port 21, since that is the standard port used for FTP communications, but your provider may use something else. Typically, you'll find the port listed in the welcome information you received from your remote storage provider.

⚠️ Important!
Whatever port you specify above must be opened outbound in your local server's firewall, or you won't be able to make a remote connection. If your firewall has separate port whitelist settings for different protocols, you'll typically only need to open the port outbound for TCP traffic.
-
In order to connect properly to the remote service, you need to specify the Remote Account Username, which was likely provided to you in the welcome information you received for your remote storage service.

-
Enter the password for your FTP user in the Remote Password field. This was also likely provided to you in the welcome information you received for your remote storage service.

-
Specify a Timeout value. For FTP, this is how long cPanel will wait for a response to a request (login or data transfer). The Timeout value needs to be at least 30 seconds, but can be as many seconds as you wish.

-
You can choose to use an FTP passive connection or an active connection by checking or unchecking the box next to Passive FTP.

⚠️ If you aren't sure what setting to use, leave Passive FTP enabled as this will not require you to open an additional range of ports in your local server firewall.
-
Finally, you need to save everything you've just entered if you want the backup transport system to use it. Clicking the Save Destination button will save what you've just entered, but won't test what you've entered to see if a successful connection is possible. If you click on the Save and Validate Destination button, what you've entered will be saved and then a separate attempt will be made by the backup transport system to use the details you've just entered to connect to the remote server via SFTP and the result of success or failure will be displayed. Finally, if you click Cancel nothing you've entered will be saved and you will be taken back to the main destinations list again.

-
Continue with the steps below this tab to continue working with existing backup destinations.
Rsync
Rsync is a command line file transfer and data synchronization tool that is highly efficient. As a cPanel backup transport "destination" it also supports remote storage of incremental backups. If you are unsure if your remote backup storage solution supports the rsync command or not, contact your provider to be certain. Generally, if you can log into your remote backup solution via SSH, have access to a command line once logged in and you are able to execute rsync --version and get a response showing the installed version of the rsync tool, you should be able to set up this as a valid rsync destination in WHM. Here is how you configure rsync in WHM:
-
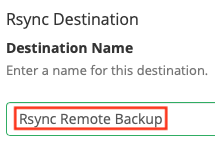
Specify a name for this new remote backup destination. The name will appear in the Destination column of the Additional Destinations table. This can be whatever you want, but it should be descriptive so that you can tell it apart from other backup destinations.
-
Since you are accessing rsync via SSH, this is a secure method of transferring data. Thus, we strongly recommend that you enable backing up your server's system files to this remote backup location. You can do that by checking the box next to Transfer System Backups to this Destination. This will allow you restore some critical server files in the event that your server is compromised or those files suddenly become damaged/unavailable locally.

-
In order to back up your data, you need to specify a location in your remote backup account to store your data. This needs to be a location in your account that your remote backup user can read and write to in a non-public area of the account. The location you specify needs to be relative to the location you start in when you first log in (your home directory). Therefore, your path should not start with a / if you do specify a location. This is optional field. If you don't specify a path or directory here, the system will try to place backups in your remote backup user account home directory.

⚠️ It is a good idea to store your backups in a directory used only for backups and nothing else so that only cPanel is reading or writing data in that location. This makes it more likely that nothing will accidentally interfere with the process of storing the backups.
-
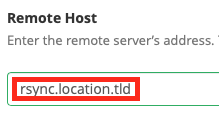
Next, you need to provide the service hostname or IP address that you use to access your remote backup account. This is the Remote Host. You can get this typically from the welcome information you received when you signed up for remote storage service. You should only enter the hostname or IP address here. The port used to access the service is specified in the step below and the path to store the backups are specified above.
-
The Port is the "channel" on which cPanel will communicate with the remote storage server. The default is port 22, since that is the standard port used for SSH communications, but your provider may use something else. Typically, you'll find the port listed in the welcome information you received from your remote storage provider.

⚠️ Important!
Whatever port you specify above must be opened outbound in your local server's firewall, or you won't be able to make a remote connection. If your firewall has separate port whitelist settings for different protocols, you'll typically only need to open the port outbound for TCP traffic.
-
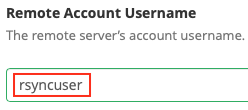
In order to connect properly to the remote service, you need to specify the Remote Account Username, which was likely provided to you in the welcome information you received for your remote storage service.
-
Now you need to specify how you want the system to authenticate with the remote backup account. Since you are connecting via SSH, cPanel's remote backup transport system supports connecting via a public/private key pair (which is the most secure option) or via standard encrypted username and password authentication. Select which Authentication Type you want to use by selecting the radio button that appears in front of the method you'd like to use:

-
If you are going to use Password Authentication, then follow the steps below. If you are going to use Key Authentication, skip to step 9.
-
Specify the remote backup user password in the Remote Password field:

⚠️ What you type in this field will not be visible while typing, so be careful to enter everything correctly. Also, if you edit this remote destination, the Remote Password field will be empty. You don't need to re-enter the password in this field unless it has changed. The system will securely remember the last password you successfully saved.
-
The only other item you have to specify if you are using a username and password to authenticate is how long you want the system to wait for the remote service to respond to the authentication request before giving up. The Timeout value needs to be at least 30 seconds, but can be as many seconds as you wish. Skip to step 10 now.

-
-
If you are going to set up Key Authentication, follow the steps below. Otherwise, skip to step 10.
-
In order for public/private key authentication to work, you must create or already have a valid public/private key pair on your local server. If you don't already have one created and you'd like cPanel to create one for you, skip down to the Generate a New Key button and follow these steps. If you already have a public/private key pair created and installed on the server, go to step b below.
-
This step is optional. If you'd like to name the key pair something specific (like "remote_backup_key"), you can specify it in the Key Filename field. If you leave this field empty, the name id_rsa or id_dsa will used once you pick the type of key you want to create below.

-
Next, enter a password you want to use with the key. You can create a key without specifying a password, but if someone gets a hold of your private key they will be able to access any services that use that key until you revoke it. If you specify a password, then the person with the key won't be able to use it unless they also know the password.
⚠️ Important!
We do recommend that you enter a secure password in the Passphrase field and keep that password somewhere secure, like an encrypted password manager. Don't forget the password or the key pair will become useless.
-
You need to choose the type of key pair you want to create. You can choose from RSA or DSA from the Key Type drop-down menu:
-
You'll also need to select the Key Size you want to use. The key size is specified in bits. Larger key sizes are more secure, but make secure communication a bit slower.
⚠️ If you aren't sure what key type or size to select, we recommend using RSA with a size of 2048 or higher.
-
Click the Generate Key button to make the new key with the settings you've specified and continue to step b. Alternately, you can click Cancel and no key will be made.
-
-
Once you have a key pair installed on your server, you can specify the path to the private key in the Private Key field:

-
If you created a key via WHM earlier, that key should appear under the list of Private Keys here. Click on the name of the key and the appropriate details will be filled into all of the fields in this section.
-
If needed, enter the private key password in the Passphrase field:

-
You need to tell the backup transport system how long you want it to wait for the remote service to respond to the authentication request before giving up. The Timeout value needs to be at least 30 seconds, but can be as many seconds as you wish. Skip to step 10 now.

-
-
Regardless of which type of authentication you choose, you now need to save everything you've just entered if you want the backup transport system to use it. Clicking the Save Destination button will save what you've just entered, but won't test what you've entered to see if a successful connection is possible. If you click on the Save and Validate Destination button, what you've entered will be saved and then a separate attempt will be made by the backup transport system to use the details you've just entered to connect to the remote server via SSH and the result of success or failure will be displayed. Finally, if you click Cancel nothing you've entered will be saved and you will be taken back to the main destinations list again.

-
Continue with the steps below this tab to continue working with existing backup destinations.
Managing Existing Backup Destinations
If you have already set up one or more backup destinations, you can
manage them in the Additional Destinations tab of the Backup
Configuration screen. If you aren't there right now, click on
the Additional Destinations tab at the top of the screen:

Below the Create New Destination section, there is a table of all of
the existing alternate backup locations:

The table provides the following information, including the name of the destination you set up in step 1 of the tabs above; the type of transport (SFTP, FTP, RSYNC, etc.); whether this backup destination is also backing up the server system files or not; if it supports incremental backups or not, whether this backup destination is enabled and actively sending backups to the remote location or not; a validation status icon (this only appears if you have run a validation recently); and a set of actions you can take on this backup destination. Each destination you've set up has its own row in this table.
Let's discuss the various actions you can take on the backup destinations in a bit more depth. The first action you can select is to Edit the existing backup destination. Clicking that takes you back to the backup destination configuration screen as seen in the tabs above.
⚠️ Remember, that if you authenticate via a password, it won't appear in the password field, but that cPanel will remember the saved password. Only update the password field if you need to change it.
The next action you can take is to remove the backup destination completely. To do this, click on Delete. WHM will prompt you to confirm that you really want to do this. If you do, click Delete again, if not, click Cancel.
You can also run a test on the configured backup location by clicking on Validate. This will cause cPanel to run a test on that backup destination. It will try to connect, authenticate and then add and remove a test file in the appropriate location. This may take some time to complete. If it completes successfully a green check mark will appear between the Status and Actions columns. If there is an issue with the test, a red X will appear in the same location. You can click on it to learn more about the result (which is most useful if there was an error). In addition to the check mark or X, a new tab will temporarily appear at the top of the screen to the right of the Additional Destination tab that you are in right now. There will be even more information about the validation results in that area, including when the test was done and how long it took.
ℹ️ If you have several additional backup locations configured, you can tell cPanel to test all of them by clicking on the Validate All Destinations button which appears next to the Actions column in the destination table.
Finally, you can choose to leave the backup destination configured, but not actually back up anything to that location. This is useful if you want to stop backups temporarily to that location, but don't want to have to reconfigure it later. Click the Disable action to disable the backup location. That will change to an Enable action if you want to turn it on again. The Status will also change to reflect whether or not backups are being made to that location.